Pages

Friday, September 30, 2016

Friday "Appy" Hour: Blincam


With wearable technology becoming more commonplace each day, it seemed it would only be a matter of time before it expand beyond watches. For this Friday "Appy" Hour I chose to highlight a product, featured in the Assistive Technology Blog article below, that has yet to hit the market, yet is already turning heads (literally and figuratively). To learn more about Blincam, read the article below...

-----------------------------------------------------------------------------------------------------------------------

Taking photos of everyday objects and scenery around us has become a way of life. All it takes these days is to whip out our smart phone and start taking photos of people, food, beloved pets around us, and all the places we go to. However, taking photos with a smartphone may be a challenge for people with not very good motor skills, amputees or legally blind photographers.

Blincam, a new camera accessory that recently finished a successful crowd funding campaign, attaches to any pair of glasses and takes photos when a person winks or (strongly) blinks their eyes – it has the ability to differentiate between normal and deliberate blinks. As simple as that! Photos taken with Blincam can be uploaded directly to the cloud, and made available for sharing with others.

Blincam only weighs 25 grams and would cost approximately $200 when it is made available in January 2017.

Watch this (very cheesy!) video to see how Blincam works.


Click here to access the original article written by Assistive Technology Blog (ATB)

Thursday, September 29, 2016

Overcoming Print Disabilities with eBooks


Those who experience a print disability, may also experience frustration or even embarrassment when interacting with traditional print materials. Simply stated, a print disability is a physical or cognitive condition that hinders a person from reading printed text. Thankfully in a day and age of technology, there are many options for e-readers for those classified with a print disability. This post, compiled by PCCSA,  shares 5 different e-book options available for students to use for both academic and pleasure reading.
 

Bookshare
 
If you cannot read traditional print books because of a visual impairment, physical disability or severe learning disability, Bookshare can help!
Our books are “accessible,” which means you can read our books many different ways.
Bookshare offers the world’s largest collection of accessible titles.

*As a district, we suggest that you sign-up for an Individual Bookshare account.
This allows the parent/guardian to access all books for their student, it is not tied to a teacher's account and/or book list.
Who qualifies?
Click here to get started with Bookshare

OverDrive
With OverDrive, ​you can borrow and enjoy free eBooks, audiobooks, and more from your public library's digital collection. OverDrive is available across a wide range of devices and platforms. All you need to get started is an internet connection, and a public library card.
 
Open eBooks is an app containing thousands of popular and award-winning titles that are free for children from in-need households. These eBooks can be read without checkouts or holds.

​The goal of Open eBooks is to encourage a love of reading and serve as a gateway to children reading even more often, whether in school, at libraries, or through other eBook reading apps.

*The PCCS A&IT Department has offered training to staff and parents of students with IEP's.
If your student has an IEP, please contact their case manager for access code/PINs.  
 
hoopla is a groundbreaking digital media service offered by your local public library that allows you to borrow movies, music, audiobooks, ebooks, comics and TV shows to enjoy on your computer, tablet, or phone – and even your TV! With no waiting, titles can be streamed immediately, or downloaded to phones or tablets for offline enjoyment later. We have hundreds of thousands of titles to choose from, with more being added daily. hoopla is like having your public library at your fingertips. Anytime. Anywhere.


Project Gutenberg
Project Gutenberg offers over 50,000 free ebooks. Choose among free epub books and free kindle books, which you can download or read them online.

No fee or registration is required, but if you find Project Gutenberg useful, they kindly ask you to donate a small amount so they can buy and digitize more books.

Click here to get started with Project Gutenberg

Wednesday, September 28, 2016

Universal Design for Learning at a Glance

The following article was written by Paul Vincent, a writer for the blog Technology Enhanced Learning.  His article clearly reiterates what is the Universal Design for Learning (UDL) and why it is so important in classrooms around the world today. The video featured in the article was created by the CAST organization, experts in UDL. If you have not done so already, sign up on CAST's UDL website to access the valuable UDL resources available.
Use of technology to enhance learning, teaching and assessment should be considered and appropriate, and should never exclude any learner from engaging in the process. The burden of inclusivity lies with all staff, by curriculum design, and it should not be left to students to adapt.
Universal Design for Learning (UDL) is an educational framework based on research in the learning sciences, including cognitive neuroscience, that guides the development of flexible learning environments that can accommodate individual learning differences. (Rose & Meyer, 2002)
UDL is a set of principles for curriculum development that give all individuals equal opportunities to learn. It provides a blueprint for creating instructional goals, methods, materials, and assessments that work for everyone – not just a single, one-size-fits-all solution but rather flexible approaches that can be customised and adjusted for individual needs.

UDL at a Glance

Three primary principles, which are based on neuroscience research, guide UDL and provide the underlying framework for the Guidelines:
  • Principle I: Provide Multiple Means of Representation (the ‘what’ of learning). Learners differ in the ways that they perceive and comprehend information that is presented to them.
  • Principle II: Provide Multiple Means of Action and Expression (the ‘how’ of learning). Learners differ in the ways that they can navigate a learning environment and express what they know.
  • Principle III: Provide Multiple Means of Engagement (the ‘why’ of learning). Affect represents a crucial element to learning, and learners differ markedly in the ways in which they can be engaged or motivated to learn.
Click  here for a printable version
 UDL Guidelines – Version 2.0: Download the UDL Guidelines [Word]: A complete narrative describing the context within which CAST developed the UDL Guidelines including explanations and examples of each principle and checkpoint.

UDL and Technology
Good educators will always find ways to design curricula that meets the needs of all learners, whether they are using technology or not. However, considered and appropriate digital technologies applied using UDL principles can enable easier and more effective customisation of curricula for learners. Advances in technology have made “on-the-fly” individualisation of curricula possible in practical, cost-effective ways, and many of these technologies have built in supports, scaffolds, and challenges to help learners understand, navigate, and engage with the learning environment.
Learning and demonstrating effective uses of technology is itself an important instructional outcome. Digital Capabilities can be defined as the skills and/or competencies required for living, learning and working in a digital society. Even today’s students need support with some areas of digital capability, particularly in an academic context, so it’s important to make sure that these needs are met.
However, it is important to note that these technologies should not be considered to be the only way to implement UDL. The goal of UDL is to create environments in which everyone will have the opportunity to become expert learners, and the means to get there, be it tech or non-tech, should be flexible.
It is also important to point out that simply using technology in the classroom should not be considered implementation of UDL. Using technology does not necessarily enhance learning, and many technologies have the same accessibility problems that non-tech options might have. Technology needs to be carefully planned into the curriculum as a way to achieve the goals. The Technology Enhanced Learning (TEL) Handbook 2015-18 is designed to guide staff in the considered and appropriate application of technology to enhance student engagement in learning, teaching, and assessment at York St John (YSJ).
In short, technology is not synonymous with UDL, but it can play a valuable role in its implementation and conceptualisation.
More information about UDL can be found at http://www.udlcenter.org/
Through engagement with inclusivity and accessibility issues, and active consideration of what and how you use technology to facilitate learning and teaching, you will be aligning your practice to the UK Professional Standards Framework (UKPSF). In particular the Professional Values and dimensions V1: Respect individual learners and diverse learning communities and V2: Promote participation in higher education and equality of opportunity for learners.
Download an Educators Worksheet for the UDL Guidelines [Word]: A worksheet listing the UDL principles and checkpoints with space for note-taking.


References
CAST (2011). Universal Design for Learning Guidelines version 2.0. Wakefield, MA: Author.
Rose, DH, & Meyer, A (2002) Teaching Every Student in the Digital Age: Universal Design for Learning. Alexandria, VA: ASCD.

Tuesday, September 27, 2016

Understanding the Importance of UDL

 Today's blog post's focus is on Universal Design Learning (UDL), which plays an incredibly important role in determining the appropriateness of assistive technology and ensuring it meets the needs of the individual. Even if you are new to understanding UDL, you've most likely seen it displayed throughout your life (predictive text on your smartphone) or within your own classroom (e-books).  The infographic below and the Q&A for Educators article written by National Center On Universal Design for Learning are helpful in clearly explaining not only what it is, but also the importance of successfully implementing it with all students, not just those with disabilities.
"It’s about building in flexibility that can be adjusted for every student’s strengths and needs." -Amanda Morin, writer for Understood.org

Universal Design Learning is a framework for learning that includes all students. Being grounded in socio-cultural theory, UDL views learning environments and social interactions as being key elements in development and learning. In UDL students are allowed to express their learning in a variety of ways. As stated above, the key principles driving UDL include flexibility, simple and intuitive instruction, multiple means of presentation, success oriented curriculum, appropriate level of student effort, and appropriate environment for learning.
Below is a handy visual from TIC that sheds more light on the principle of Universal Design Learning and provides some resources to help teachers integrate UDL in their classroom.

What Is UDL and How Can You Make It Work in Your Classroom?


You’ve probably been differentiating instruction for your students in one way or another since you started teaching, so you may be wondering, “What’s all the buzz about universal design for learning (UDL)?” Sure, planning all your lessons to cater to every student’s individual learning style is ideal, but realistically, how can you make UDL work in a classroom of 30 or more students? 


Here are six steps, adapted from Your UDL Lesson Planner by Patti Kelly Ralabate, to make UDL lesson planning work in your classroom and give all students an equal opportunity to learn.


STEP 1: Ready. Set. Goal!
First, ask yourself, “What’s the goal of this lesson?” (Hint: Many times Common Core or state standards help you figure it out.) Even though the standards may be a starting point, the learning goals should focus on your students—specifically their knowledge, skills and perceptions. Try to make goals SMART: specific, measurable, attainable, results-oriented and time bound. It sounds like a lot of work, but taking time up front to make sure goals are solid, makes everything else easier.


STEP 2: Think through individual differences.
Before you dive into teaching your lesson, take a few minutes to think about variability in your students—any individual differences in their current skills, learning gaps and needs. Do you have a student who gets easily distracted or may feel frustrated for some reason? Think about what types of scaffolding (e.g., pre-teaching vocabulary) you can use to set up your students for success.


STEP 3: Decide how you’ll check that students are “getting it.”
Think about how you’ll check your students’ understanding throughout the lesson to make sure they’re meeting the goals you set. Besides helping you know if your students are “getting it,” informal checks can also help you see whether you’re teaching too fast or slow or if the information is clear. If you have students who are on an IEP or 504 plan, find out if they have any assessment accommodations you need to provide.


STEP 4: Pick and choose materials and methods wisely.
To make learning motivating and memorable, ask yourself questions like, “Are these math manipulatives distracting or will they actually help my students learn?” This is also a good time to think back to your students’ individual differences and plan accommodations or modifications, like using different colored markers on the whiteboard or allowing a student more time to finish an activity.


STEP 5: It’s time to teach!
Now it’s time to pull it all together and deliver your awesome UDL lesson. Throughout your teaching, try to use a flexible approach to check your students’ understanding and make sure they meet the learning goals you set.


STEP 6: Hold a mirror up to your lesson.
After your lesson is over, take time to think about how it turned out. What worked well? What will you do differently next time? Did all your students achieve the learning goals you set? What’s next?
 

How does UDL lesson planning look in real classrooms? Visit the Brookes Inclusion Lab to see how three teachers with very different needs use these six steps in their lesson planning.


Click on the link to access the original article by Jen Lillis on the We Are Teachers website (sponsored by Brookes Publishing)

Monday, September 26, 2016

Motivational Monday


Friday, September 23, 2016

Keyboarding With Dysgraphia

The following article, written by Susan William, a parent of a child with dysgraphia, was featured on the blog Education Possible. In her blog post, Susan shares strategies she successfully implemented in her homeschool environment with her child to teach him keyboarding skills. As we all know so well, when working with children with disabilities, there is never a "one size fits all approach". Therefore, it's important to keep in mind the student and their specific needs prior to selecting the strategy to implement in order to ensure it has the greatest chance of being successful when implemented.

*Disclosure: Susan had been using Keyboard Classroom in her homeschool. She received free access to the site to help gather information for this review. She is sharing her personal opinions based on her son's experiences. This post contains affiliate links.

--------------------------------------------------------------------------------------------------------------------------


Dysgraphia is a learning disability that affects writing. My son has struggled with writing as long as he can remember and for years we have searched for solutions to help him with his writing. In a previous post I shared How I Teach Writing to My Child With Dysgraphia and the response to that post was amazing! I have had an opportunity to talk with many other families who are like us, searching for solutions to help our children.

This year my son is completing much of his school work using a computer. We have found it is easier for him to get his thoughts out when he can type them into a computer rather than write them on paper. He has been using computers for many years for some of his regular curriculum like math and science, therefore he is comfortable using a computer.

I wanted to make sure he had strong keyboarding skills so over time he could begin to think less about the act of typing and more about getting his thoughts out of his head and onto the screen.

We have tried other keyboarding programs before but most have been too busy, trying to use a game format or confusing graphics to teach basic typing skills. My mission this year was to teach keyboarding so my son could build solid skills as efficiently as possible.

Keyboard Classroom
The program we finally found that works for my son is called Keyboard Classroom.

I’ll explain a few of the benefits we have found from this program, but I want to start by sharing my son’s favorite part of the program – Finger Guides.

Finger Guides

Finger Guides are plastic bars you attach to your keyboard with velcro strips.


My son struggles with motor skills (that’s why holding a pencil correctly is a challenge) so it only made sense to me that adding in a physical guide would help him maintain the proper hand positioning AND allow him to build muscle memory while practicing the correct key strokes. It’s not complicated – it’s actually quite simple and effective, but a feature we had not found before.

Finger Trainer

After the Finger Guides are attached to your keyboard, the Finger Trainer exercises begin. These exercises are very straightforward – they show the child the correct location and finger placement for each key.

If you take a look at this image you will see they use colors for each finger and for the corresponding keys that finger should strike.


By having this image on the screen it encourages the student to keep their eyes on the screen rather than looking down at their hands. Oh yes, my son (as most students probably would) looked down at the keyboard at first, but I was very surprised by how quickly he was able to build his muscle memory and just keep his eye on the screen.

15 Minutes a Day

This program is designed to build skills slowly but surely through practice and repetition. Children begin by learning the placement of each key as they type the alphabet. They then move on to typing words, then sentences and finally learn how to capitalize words. Fluency is built by working through practice and then timed sessions until the child feels comfortable.

My son likes schedules and routines so as we read through the materials for Keyboard Classroom he noticed the statement that said:


He decided that meant he should practice for 15 minutes a day, and that is what he does. He sets his timer for 15 minutes and comfortably moves through the material at his own pace.

Many other typing programs we had tried focused on achieving certain levels and winning points or tokens. It took my son a little while to understand that this is a different format – he just needs to put in the time and practice well and the results have definitely followed.

A Few Details
I know when I look at new programs I have a few basic questions – cost and ease of use are at the top of the list!

For a concise overview of the format of the program I suggest you take a few minutes to review this short video:


If you decide this might be an option for your family, here are a few details to consider: 
  • The program claims to be designed for children ages 8 and up and the video clip mentions ages 7-14. I believe this program is appropriate for the stated ages and even for older teens if they need to solidify their keyboarding skills. 
  • Because the Finger Guides are part of the program this is a program you order and receive in the mail (the Finger Guides and a disk with the program materials). 
  • When you purchase the program you are getting a “user license”. This means that only one person can use each license at one time. ** Keyboard Classroom is now offering a Family License for up to 5 family members!** 
  • If you have one child, purchase a Single User License 
  • If you have more than one child AND you want each child to use the program AT THE SAME TIME you would purchase the new family license! 
  • The Finger Guides may not fit on every keyboard. Some of the newer more streamlined keyboards may not have enough space above the top row of keys for the Finger Guides. You will need about 1/4 inch above and below the keys for the Finger Guides. 
  • If your current keyboard does not have that much space you can purchase an inexpensive keyboard (less than $20) to use with the Finger Guides. I realize that is an additional expense, but if your child really benefits from the Finger Guides is could be a valuable investment.


We have been very pleased with the results of this program. My son has been using Keyboard Classroom for about 3 months and he is very excited about his progress. Hisspeed and accuracy have improved dramatically and he no longer looks at his fingers when he types.

We know that not every program will work for every student, but if you would like to learn more to see if this might be a fit for your child, please visit the Keyboard Classroom website.


Click to access the original article

Thursday, September 22, 2016

Dos and Don'ts on Designing for Accessibility


When considering and designing accessibility, there are many areas of consideration. Today's post shares six different printable posters from a series created by Gov.org's website, which focus on the areas of: dyslexia, physical and motor disabilities, hearing impairments, vision impairments, autism spectrum and the use of screen or e-readers. Of course, these "dos and don’ts of designing for accessibility" are presented as general guidelines with the consideration of best design practices for making daily life more accessible for those with any of these disabilities.

Click for printable version of the austistic spectrum poster
Click for printable version of the hearing impaired poster
Click for printable version of the dyslexia poster
Click for printable version of the screen/e-reader poster
Click for printable version of the low vision poster
Click for printable version of the physical/motor disabilities poster

The posters can also be found here: 


Wednesday, September 21, 2016


The hot, new comedy series "Speechless" starring Minnie Driver, John Ross Bowie, Mason Cook, Micah Fowler, Kyla Kenedy, and Cedric Yarbrough is coming to your living room premiering on Wednesday, September 21 at 8:30/7:30c on ABC. Maya DiMeo (played by Minnie Driver) is a mom on a mission who will do anything for her husband, Jimmy, and kids Ray, Dylan, and JJ, her eldest son with special needs. As Maya fights injustices both real and the ones she creates in her head, the family works to make a new home for themselves and searches for just the right person to give JJ his "voice."


What makes me so excited about this show is that the focus of the show rests upon the struggles many parents experience in their desire to advocate for their child with a disability, while balancing the normal everyday demands from their partner, job and other children. Additionally, Speechless is pushing boundaries and broadening our minds to highlight a child with special needs who relies on AAC. From the official trailer, this show seems witty, the characters appear charismatic, and hopefully the show will diminish some of the stigmas many who rely on assistive technology as their voices, specifically augmentative devices, face in their daily lives.  The ultimate success this show could have is allowing people to look beyond the disability and see each person as just that.....a person!

Actor, Micah Fowler


Check out an interview the actor Micah Fowler gave to The Mighty about his role in Speechless!
http://themighty.com/2016/04/micah-fowler-actor-with-cerebral-palsy-stars-in-abc-pilot-speechless/


 Watch the trailer for Speechless.....be prepared to laugh!


Webinar Wednesday: How to Move Your Entire District to Support Struggling Readers

This week's "Webinar Wednesday" brings to you a free (hooray!) upcoming webinar from Learning Ally and edweb, which discusses strategies developed by the Denver Public Schools and Learning Ally to help narrow the gap struggling readers face through the use of technology. How to Move Your Entire District to Support Struggling Readers webinar takes place on Monday, September 26, 2016 from 3pm-4pm EDT. The description below provides a more in-depth overview of what can be expected when joining the webinar. You can register at the bottom of the article.
Do you have strategies to deliver content to struggling readers in your district? A significant percent of students are at great risk of failing to meet standards, with dire consequences.
If not identified and addressed, consequences of dyslexia alone include students dropping out of school and being less able to support themselves or their families. The Knowledge and Practice Standards of the International Dyslexia Association states “reading disabilities are the most common cause of academic failure and underachievement.”
In response, Denver Public Schools and Learning Ally joined forces to find solutions to bridge this content and education gap. In this webinar, Rob Frantum-Allen (Director of Integrated Services) and Jackie Bott (Assistive Technology Coordinator) will explain how the organizations created a strategically designed model program where assistive technology (AT) is being integrated into educational efforts. They’ll discuss:
  •  How ongoing tailored training of teachers and school staff helps ensure the full activation of ear reading through audiobooks
  • Designing effective strategies to address needs of eligible students through Universal Design for Learning methodology
  • Techniques to encourage eligible students to proactively and consistently use AT to access grade level content and achieve grade level learning
Robert Frantum-Allen currently serves as the Director of Integrated Services at Adams County School District 14 in Colorado. Robert was instrumental in Denver schools when he served as a Program Manager for many years. He also serves as adjunct professor at the University of Denver. Rob has expertise in Assistive Technology and Universal Design for Learning. He also has studied metacognition pertaining to student achievement. Rob is a champion for students and leads cross-functional teams to produce better outcomes.

Jackie Bott is the Assistive Technology Coordinator for Denver Public Schools. She has taught many populations of students, including elementary general education students, students with mild or moderate disabilities of all kinds, kids with severe developmental disabilities of all ages, and kids with severe social and/or emotional disabilities at the secondary level. She has a master’s degree in Research & Evaluation and is committed to research-based applications of technology in the classroom. Jackie is always looking for innovative ways to combine new technologies and strong professional development for teachers to close the achievement gap and increase positive student outcomes across all areas affecting child development and learning.

Join the Empowering Struggling Readers community to network with educators, participate in online discussions, receive invitations to upcoming webinars, view past webinars, take a quiz to receive a CE certificate for a past webinar, and access free resources.

 Learning Ally empowers students who read and learn differently so that they may thrive. We help them to overcome obstacles and discover strengths, as we guide them along a path that ensures success.

Monday, September 19, 2016

Motivational Monday


Friday, September 16, 2016

Friday "Appy" Hours: 13 Tech Tools for Expression...

Often times learners with print disabilities face significant hurdles when presented with tasks that require expression. The incredible team at PATINS (Promoting Achievement through Technology and INstruction for all Students) compiled in February of 2016 the following list of 13 tech tools to assist those who struggle when it comes to print disabilities and oral and written expression. The purpose of the list is to empower learners to "express" and show what they truly know.

--------------------------------------------------------------------------------------------------------------------------


Give students with print disabilities systematic use of accessible educational materials (AEM) when print is a barrier to learning and the doors open to curriculum mastery, school success, independence, social-emotional growth and more.

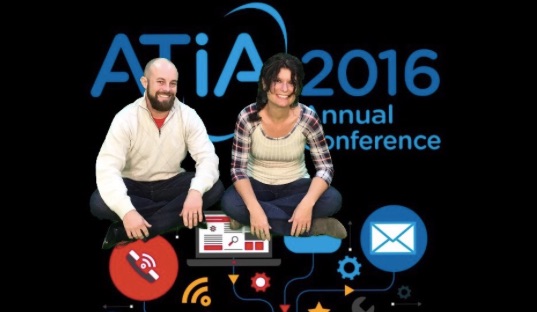
Help At Hand Digital tools are a strategic means of "expression" for students who struggle with written and oral language. Thanks goes to Daniel McNulty, State Director PATINS Project and Kelli Suding, a PATINS Center Regional Coordinator in Indiana, a counterpart to AIM-VA. They shared some of their digital best bets at a session this month at the ATIA 2016 conference that is held annually by the not-for-profit membership organization of manufacturers, sellers and providers of technology-based assistive devices and/or services.

Free, Low Cost 
These tools are readily available, and all are either free or low cost. Daniel and Kelli explained that after training even very challenged students can conduct research, gather content and, show what they know using voice/audio recording, supported writing, digital imagery, and video. Here are their recommendations:

Simplify Information

Rewordify.: A free web tool to:

Simplify difficult English, for faster comprehension
Teach words and build vocabulary

Wikipedia.: Go to the "Simplified English" tab found listed with other languages in the left hand column to provide students with a "real experience" in researching a topic in less complex language.


Produce Text

My 1st Keyboard App. @ $1.99 for a limited time: A traditional and alternative keyboard. with drawn images embedded in letter shapes, large letters, and other supports

Spell Better. is a free app that supports dyslexic and other struggling readers and writers by providing several literacy supports


Convey Meaning

Creative Commons: Go here to teach about copyright protection for student products and the works that they use.

Flcker's Creative Commons photos: This link or the "Only search with Creative Commons-licensed photos" on the main site limits choices and respects copyright.

PhotoFunia: Have fun with photo effects and an online editor and make compositions and collages for free.

Pixlr-o-matic: Find this photo and image effects tool ion the web, as a download, on Facebook, as an Chrome web app and for iOS or Android devices.

Photo-mapo Check out this "maker" tool for $2.99 on the App Store to add a map and descriptions to a photo.

Green Screen by Do-Ink @ $2.99 is an easy way to produce videos and photos on the iPad and iPhone.

Tellagami: This app (free but with in-app purchases) makes quick videos about curriculum content and also supports instruction of social skills and emotions.

Book Creator: A "must-have" app @ $4.99 to make ebooks on an iPad. There are over 15 million ebooks created thus far, including children's picture books, comic books, photo books, journals, and textbooks.

Explain Everything: Use this interactive whiteboard @$3.99 to write, draw, record and explain what a student knows via video for iPads, Windows, and Chrome.


Follow AIM-VA on Facebook , Pinterest , and Twitter at @AIMVirginia and/or follow me @aimnoncat.

Click here for the original PATINS article.

Thursday, September 15, 2016

Creating Your Own Professional Twitter Page


As a professional in the field of educational technology and assistive technology, I cannot say enough about how important it is to utilize social media outlets, like Twitter, to connect, network and engage with other professionals who are in the same fields. On a daily basis I am connecting with my PLN (Personal/Professional Learning Network) through Twitter, and it is here that I am continually learning about the latest technology advances, resources, ideas and professional development opportunities in educational and assisitive technology. See my previous post about the top 10 reasons every teacher needs a PLN


In hindsight, which we all know is 20/20, I wish I had joined the Twitter world much earlier on in my career. As Craig Kemp (@mrkempnz) stated in his article 10 Steps to Creating the Perfect Educational Twitter Account, Twitter "is the BEST form of FREE Professional Development I have ever found". Craig's article, featured below, shares his passions behind using Twitter and how it makes him a better educator.

To create a globally connected PLN, Craig firmly believes engaging in the online world of Twitter is a must. To get started, follow these 10 easy steps that he suggests:

1. Go to www.twitter.com and fill in your name, email address and password and Click “Sign up for Twitter.
Twitter start screen

2. When prompted choose your username – think to yourself, how do I want to be seen as online to my Education network now and in the future. I am @mrkempnz (simple, but effective).


3. Click “Create my account”
createmyaccount

4. Next, start following people that you look up to or admire. If you want to follow celebrities, be prepared for a lot of ‘rubbish’. Some suggestions for Education ‘celebrities’ that you should follow instead are:
5. Do some searching and click on the “FOLLOW” button beside anyone you want to connect with. Their tweets will appear in your feed.

6. Once you are finished connecting, you need to ‘de-egg’. When you start twitter you get assigned your ‘egg’ as your profile picture. Let the world see who you are – upload a professional photograph, symbol, or cartoon of yourself. Click on the empty profile photo to upload an image of yourself.
Slide1
7.  Make sure you follow me @mrkempnz and @lrdichiara so we can support you along the way and help connect you with some amazing educators.

8. Edit your profile and add the important details about who you are and what you are passionate about by clicking on ‘Edit Profile‘ – this is what my profile says – it may help you craft your short bio:

                Screen Shot 2016-02-17 at 4.29.56 PM


9. Send out your first tweet by clicking on the blue box. Type your first tweet in less than 140 characters (maybe you can say something like: “Hey @mrkempnz I am on twitter and I can’t wait to learn more about how to use it at your #21CLHK workshop”). By including my @mrkempnz tag I will get a notification alerting me you are mentioning me in your post.
tweetitout

10. Start exploring Twitter. Have a look around, wait for me to reply to you and start adding some people you might know. Let’s get connected!

**Added**
Check out this chart to help get you started with the Twitter lingo! 
  
Also, download the free resource below put together by Amber Coggin from the Mobile County Public Schools.
http://images.pcmac.org/Uploads/MCPSS/MobileCounty/Departments/Forms/Twitter%20for%20Educators.pdf
http://images.pcmac.org/Uploads/MCPSS/MobileCounty/Departments/Forms/Twitter%20for%20Educators.pdf 

Wednesday, September 14, 2016

Webinar Wednesday: Alumni Webinar: Assistive Technology in the Workplace with Jamie Martin


Jamie Martin ⌨Eye to Eye Alumni hosted their first webinar in July of 2016 on a topic that many of us  are curious to learn more about, which is why you've found your way here, right?  Assistive technology in the workplace! In this excellent webinar, Jamie Martin (@ATDyslexia), an expert on assistive technology and dyslexia, as well as a writer for Understood.org, shares various tools, software, apps, and other technology to help you become more successful in your everyday life and within the workplace (or even school setting).


How to be an A-Plus IEP Leader


With many teachers already back to school or with the new school year just on the horizon, you’ve probably been thinking about your current/incoming class and all the ways to support your diverse learners.

So, let’s talk IEPs. Specifically, what you can do as an educator to lead and support a smooth IEP process, from start to finish.

Below you can find a handy booklet of quick tips for you—it’s adapted from a recently published book, The Educator’s Handbook for Inclusive School Practices by Julie Causton and Chelsea Tracy-Bronson. It outlines what to do:
  • A month before an IEP meeting
  • The day of the meeting
  • After the meeting
You’ll also get some helpful tips to keep in mind during the whole IEP process to ensure the best results for everyone involved.

Download the booklet here, and please share with your friends who are passionate about inclusive education.

inclusive educators lead the IEP process